Installing a heat pump into your home provides incredible energy efficiency, cost savings, and year-round comfort. However, these units require proper installation for a system that operates effectively and lasts for years to come. Explore the heat pump installation process to feel confident in choosing the best system and setting it up for success.
1. Introduction to Heat Pumps
Heat pumps offer an energy-efficient way to heat and cool your home, working by transferring heat rather than generating it. They provide a single solution for year-round temperature control and reduce reliance on conventional heating fuels.
Proper installation is critical, as even minor errors lead to reduced performance and higher energy consumption. A well-installed heat pump also reduces wear and tear, extending its lifespan. Investing in the right system and a skilled installation is essential for long-term energy and cost savings.
2. Assessing Your Heating and Cooling Needs
Every home is unique, and choosing the right heat pump starts with understanding your specific heating and cooling requirements. Factors such as the size of your home, the Philadelphia climate, and each room’s energy needs play a major role in system selection.
Conducting an energy assessment allows professionals to identify areas of energy loss within the home and evaluate your current system’s performance. This testing ensures your heat pump meets your household’s demands. Without properly assessing your needs, you risk installing a system that’s either too large or too small, both of which undermine efficiency.
3. Choosing the Right Heat Pump for Your Home
When it comes to heat pumps, there are several types to choose from, including air-source, ground-source (geothermal), and hybrid systems. These are the main features of each type:
- Air-source heat pumps are ideal for milder climates like Philadelphia. It takes the heat from the air inside or outside a building and releases it into the opposite space.
- Geothermal systems offer unparalleled efficiency and longevity by using the earth’s stable temperature and taking heat from the ground.
- Hybrid systems are a combination of a heat pump and a gas furnace that provide a significant boost in heating efficiency.
Matching the heat pump to your home’s specifications, such as energy efficiency goals and insulation quality, is key. An experienced HVAC technician can guide you through options to find the best fit.
4. The Importance of Professional Installation
Hiring a certified and experienced technician is one of the best decisions when installing a heat pump. Our professionals install the system according to the manufacturer’s guidelines, which is essential for maintaining efficiency, performance, and warranty coverage.
DIY installation might seem cost-effective, but it often leads to errors such as poor placement or incorrect electrical connections, which shortens the system’s lifespan. Additionally, our heat pump installers provide valuable advice, ensuring you understand how to operate and maintain your system. Entrusting the job to an expert protects your investment.
5. Pre-Installation Inspection and Planning
Before the installation begins, your contractor will conduct a thorough inspection of your home and installation site. This inspection includes evaluating indoor and outdoor spaces, identifying potential obstacles, and ensuring your home meets structural and electrical requirements. Factors like available space, existing ductwork, and access to electrical connections are all considerations.
Proper pre-installation planning ensures the process is efficient and minimizes disruptions to your home. Inspecting and planning also reduce the risk of costly adjustments during or after the installation process.
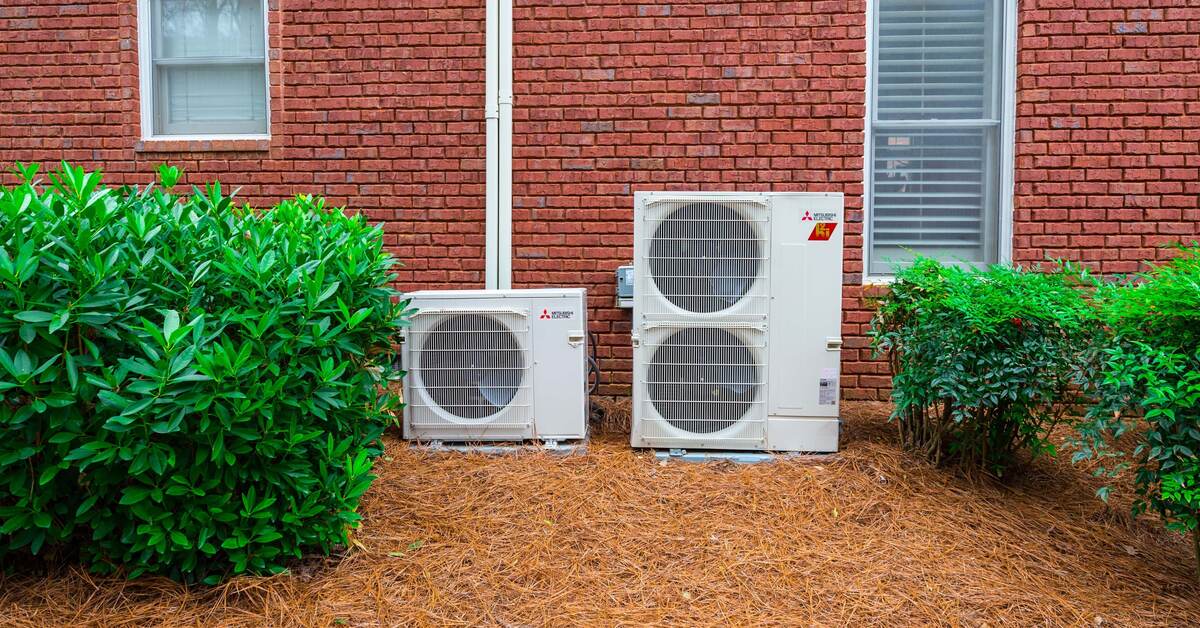
6. Determining the Best Location for the Heat Pump
The placement of heat pump components, including the indoor and outdoor units, has a significant impact on performance and noise levels. Outdoor units require a location with sufficient airflow, away from obstructions like walls or bushes, and as close to the interior unit as possible to minimize tubing length.
For indoor units, choose spots with good airflow and easy maintenance access. Strategically placing the heat pump units ensures optimal efficiency and reduces noise and vibration.
7. Preparing Your Home for Installation
To ensure a smooth installation process, you need to do some preparation beforehand. Clear the installation area of any furniture, plants, or obstructions to provide technicians with sufficient working space. Ensure that electrical and plumbing connections are within reach of the system’s designated location. Depending on the unit, you may need additional structural reinforcements, like a concrete pad. Communicate with your installation team to understand what to expect and how to prepare.
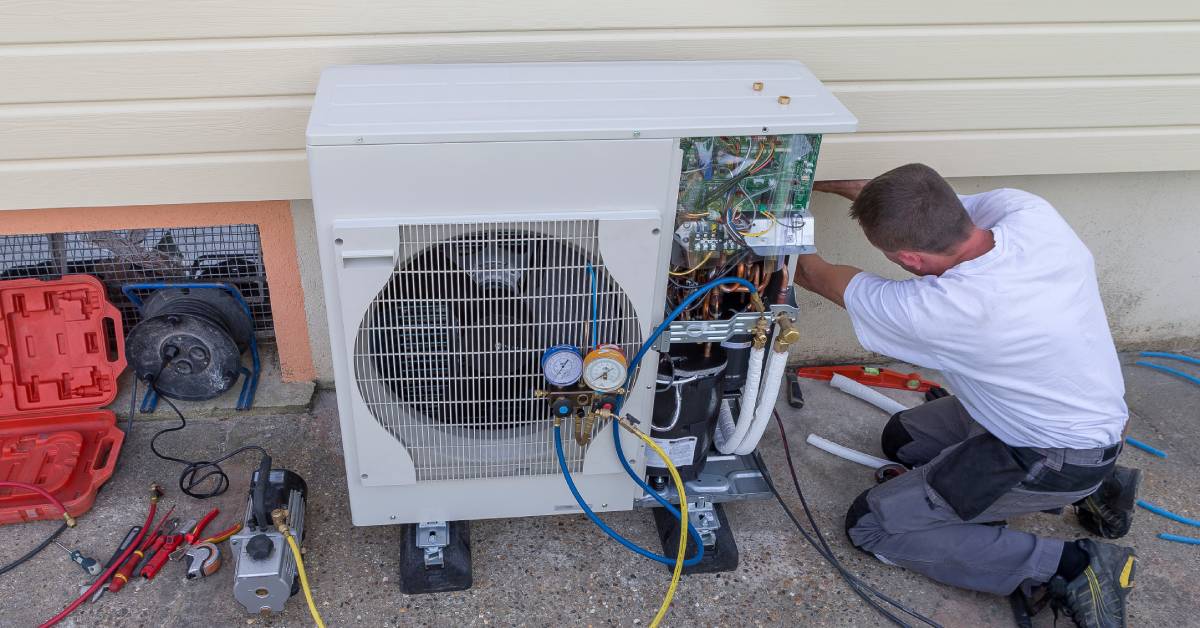
8. Installation of the Outdoor Unit
The installation process begins with setting up the outdoor condenser unit. The unit is anchored to the ground or mounted on a platform to protect it from vibration and potential damage. Proper alignment is crucial for maintaining airflow and efficient operation.
Technicians also inspect to ensure that the unit is level and adequately spaced from nearby walls or landscaping. The outdoor unit’s location and setup play a major role in its efficiency and durability. A solid foundation ensures reliable performance throughout the life of the system.
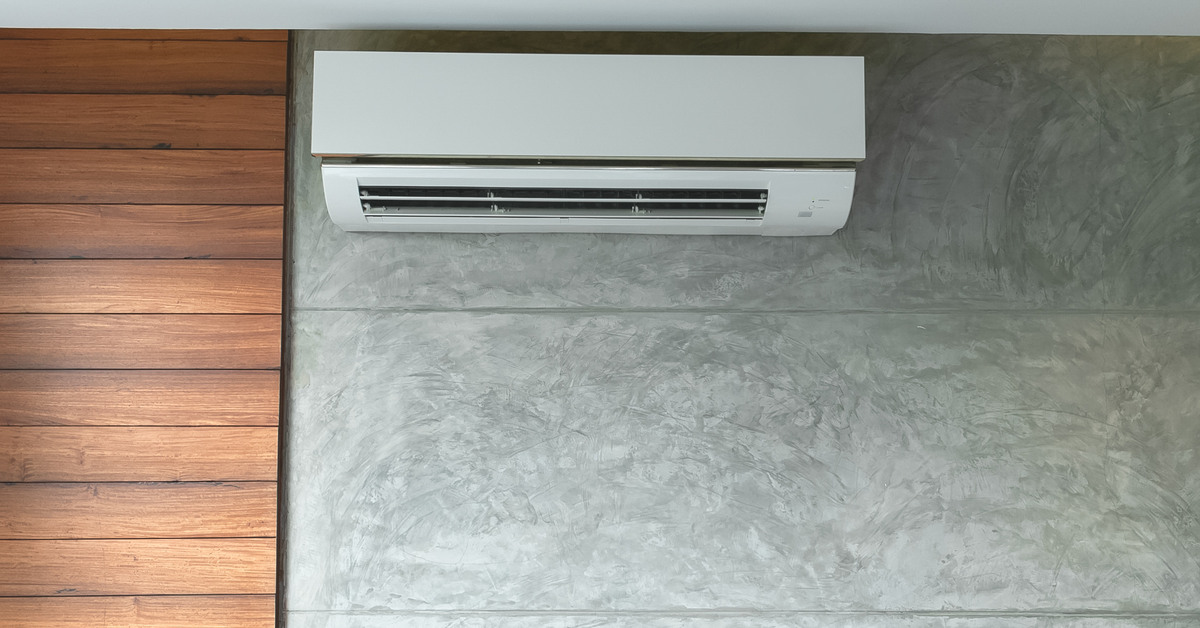
9. Installation of the Indoor Units
For ducted systems, existing or new ductwork connects the unit to airflow vents. Ductless systems, such as mini-splits, involve mounting units on walls and connecting them to the outdoor system.
Your setup—whether it’s a single-zone or multi-zone system—determines how many indoor units you need. Technicians ensure the units maximize airflow and deliver even temperature control across rooms. The installation of the indoor units lays the foundation for consistent and comfortable indoor temperatures.
10. Connecting the Components
Once the indoor and outdoor units are in place, the next step is to link them using refrigerant lines, electrical wiring, and drainage systems. These components enable the transfer of heat and operation of the system, so ensuring accuracy is vital.
Proper insulation of the lines minimizes energy loss and protects against environmental factors. The seamless connection of components ensures that the heat pump operates effectively and delivers optimal results.
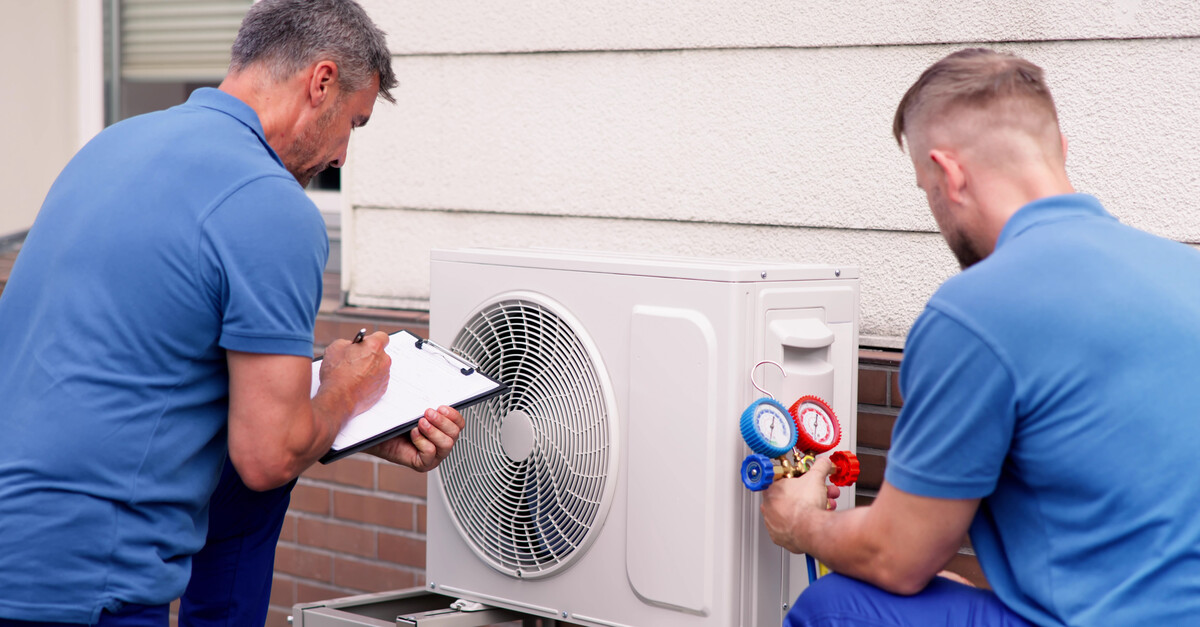
11. System Testing and Calibration
The system then undergoes rigorous testing to confirm functionality. Technicians check all components, including refrigerant levels, airflow, and thermostat communication, to verify that the system is working efficiently.
Any adjustments necessary for calibration occur at this stage to fine-tune the system for optimal performance. This testing process ensures the heat pump is safe, reliable, and ready to deliver consistent comfort.
12. Explaining the Control System
With the system operational, your technician will guide you through using the thermostat and other system controls. Understanding how to adjust temperatures effectively and set energy-saving modes can maximize the value of your system.
Technicians share practical tips, such as the ideal temperature settings for summer and winter. Mastering the controls empowers you to make the most of your new heat pump while keeping energy bills low.
Investing in a properly installed heat pump provides significant benefits in the short and long term. Understanding the heat pump installation process ensures you use the system effectively and makes the process easier for professional installers. With the right care and attention, your heat pump will meet your heating and cooling needs for years, offering savings, sustainability, and satisfaction.